
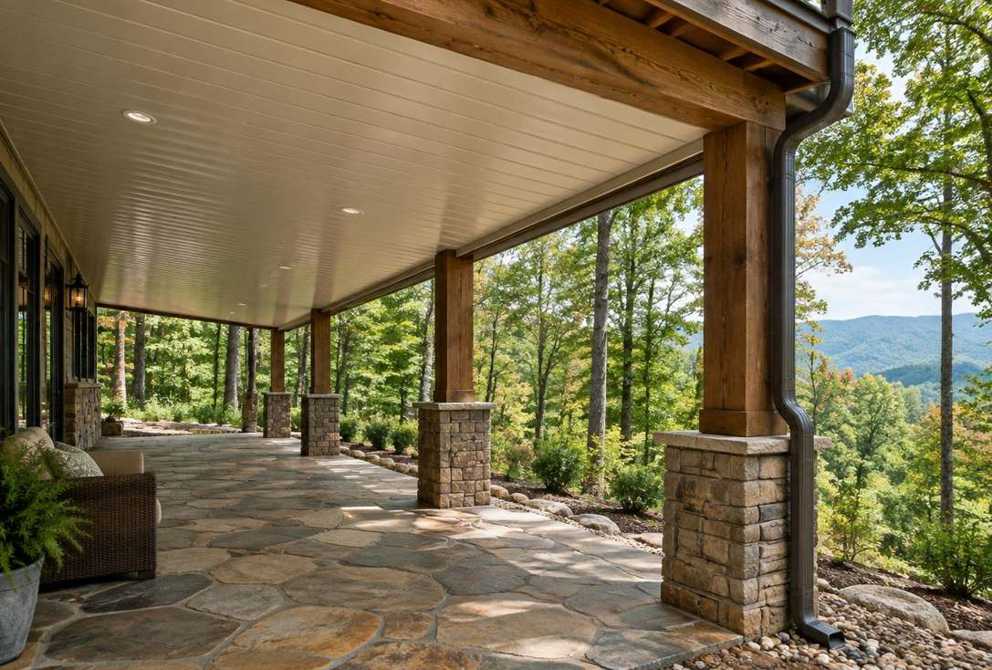
Under Deck Drainage: Inspect First, Get a Written Scope
Compare under-deck drainage options for Western NC homes. Check framing, headroom, slope, gutters and discharge before planning a dry outdoor living space.
Key Takeaways
The right under-deck drainage method depends on framing condition, access, headroom and the product installation instructions. Some systems fit below existing joists; others go above joists before decking is installed. Compare membrane, rigid panels and site-built EPDM before choosing. Plan slope and discharge for the selected system and the mountain site.
TL;DR:
- Retrofitting with membrane and trough systems is ideal for uneven joist spacing and posts inside framing, while rigid panels require consistent bays and ample clearance.
- Follow the selected manufacturer's required slope; some guides use 1/8 to 1/4 inch per foot, but that is not a universal specification for every system.
- Route discharge away from foundations and neighboring property to an approved location. Distance, grading and drainage requirements are site-specific.
- Site-built EPDM systems offer the lowest material costs and highest customization for new construction projects, but require precise installation and structural condition checks.
- Regular maintenance, including biannual debris removal and annual seal inspections, extends system lifespan and prevents early failure.
Types of Under Deck Drainage Systems: Membrane, Panels, and Site-Built EPDM
Every under deck drainage system does the same basic job: catch water falling through the deck boards, channel it sideways, and dump it somewhere that isn't your foundation. How each one does that varies enough to matter for your project.
Membrane and trough systems collect runoff into a gutter. Some are designed above joists before deck boards go down, while others fit below existing framing. Confirm the product is approved for the proposed retrofit instead of assuming every membrane can be threaded underneath.
Rigid panel systems use V-shaped vinyl or aluminum panels that snap up under the joists, creating a clean, paintable ceiling below. TimberTech's DrySpace line is a common example of this category. The tradeoff is clearance. Panels eat a few inches of headroom, and they get awkward fast around support posts or irregular framing.
Site-built EPDM can be customized to the framing, particularly during new construction. Installed cost depends on compatible details, labor, gutters and access; it is not automatically the cheapest option.
Quick guidance on fit:
- Retrofitting an old deck with posts inside the frame? Membrane and trough.
- Want a drywall-like ceiling with recessed lighting? Rigid panels budget permitting.
- Building new and want the lowest material cost? Site-built EPDM.
- Have a qualified contractor evaluate structural concerns, overhead work and complex discharge routing. Electrical ceiling work belongs with a qualified electrician and suitable wet-location products.
How Under Deck Drainage Actually Works
The physics here are simple, but the details determine whether the system holds up through ten years of mountain storms or fails in year two.
Slope comes first. Installation guidance from Journal of Light Construction calls for a pitch of 1/8" to 1/4" per foot across every trough or panel run. Too flat, and water sits, stresses the seams, and eventually finds a way through. That pitch feeds into a collector gutter, and manufacturer specs like TimberTech's DrySpace installation guide require a similar 1/8" per foot pitch on panel runs, with panels stopping short of the fascia to keep drainage and ventilation clear.
From the collector gutter, discharge must move water away from the foundation without creating erosion or affecting adjacent property. A downspout extension or approved drainage connection must suit the slope and local requirements; four feet is not a universal code minimum.
A basic install sequence looks like this:
- Mark and snap a chalk line for consistent slope across all joist bays.
- Hang the membrane or install panels, working from the high end down.
- Seal every seam and post penetration with compatible sealant.
- Connect troughs to a collector gutter sized for your roof and deck runoff combined.
- Route the downspout to an approved discharge location away from the foundation, with erosion control suited to the site.
Pro Tip: Build in one or two removable access panels near low points in the trough system. Leaves and pine needles collect there, and a flush-out twice a year beats tearing into a sealed ceiling later.
Seams and post penetrations are where these systems fail most often. Extra sealant at every joint, plus those access points for cleaning, prevents clogged troughs from undermining the whole system.
Retrofit vs New Build: What Changes the Installation
A drainage system installed before the decking goes down is a different job than one squeezed under a deck that's already standing. New construction lets you set trough spacing and slope without working around anything. Retrofits force compromises.
Before you commit to a method, walk under the deck with a tape measure and check:
- Headroom: is there enough vertical space for a trough or panel system plus slope, or will you be ducking under a 5-foot ceiling?
- Joist spacing consistency: are the bays evenly spaced, or does the framing wander?
- Post locations: are structural posts inside the joist bays, where they'll interrupt a panel run?
- Ledger and rim beam condition: any soft wood, rust streaks, or old water stains?
- Access: can you actually route a gutter and downspout to a discharge point without cutting into siding or landscaping?
Retrofit suitability is product-specific. Confirm whether the system belongs above or below joists, whether decking removal is needed, and how posts, ventilation and service access will be accommodated.
Building drainage into new construction, on the other hand, simplifies everything. You set the slope once, choose your finish material without fighting existing joists, and skip the retrofit workarounds entirely. If your inspection turns up soft ledger wood or a sagging rim beam, stop there. That's a structural repair job, not a drainage project, and no membrane will fix it.
Cost, Labor, and Maintenance for Under Deck Drainage
Budget depends on deck size, framing condition, access, ceiling finish, system choice and discharge routing. Product prices and installation labor vary with the selected system and site conditions. Obtain an itemized written estimate for your actual deck.
What actually drives the final number:
- Deck size and joist bay count (more bays, more seams to seal)
- Finish level (open trough vs. a painted, panel-covered ceiling)
- Prep work (rot repair, post relocation, ledger flashing fixes)
- How far the discharge point has to travel from the collection gutter
Maintenance is light but not optional. Clear leaves and debris from troughs and gutters at least twice a year, more often under heavy tree cover. Inspect seam and post seals annually, and check for sagging or standing water after any major storm.
Lifespan differences matter here too. EPDM membrane, kept out of direct sun, holds up for years with minimal degradation, while rigid panels tend to last as long as their fastener seals hold, which depends heavily on install quality. Neither system replaces structural inspection. Drainage reduces moisture damage but doesn't fix framing rot that's already underway.
When to Call Highlander Building Services for Your Under Deck Drainage Install
Some drainage jobs are weekend projects. Others aren't, and knowing the difference before you start cutting membrane saves you a redo.
Before planning drainage work, ask your contractor to evaluate:
- Ledger and joist condition, checking for soft spots or old water damage before anything gets sealed over
- The full discharge path, from trough to gutter to final daylight point
- How the new system ties into existing house flashing and gutters, so water isn't just redirected into a different problem
- Any conflicts between planned drainage and existing posts, stairs, or low-clearance framing
Written estimates with pricing laid out before work starts are recommended, especially for jobs with hidden rot, tricky discharge routing, or ceiling finishes that involve electrical work. If your headroom is tight, your post layout is irregular, or you want a finished panel ceiling with recessed lighting, that combination usually pushes a project past the comfortable DIY range.
Why Retrofit-First Thinking Beats the One-Size-Fits-All Advice
Most guides treat under deck drainage like a single decision: pick a system, install it, done. That's backwards. The framing you already have should dictate the system, not the other way around. A homeowner who buys rigid panels because they look cleanest in photos, then discovers their posts sit inside the joist bays, ends up fighting the product instead of solving the problem.
The conventional advice also underplays maintenance. Sealing a system once and forgetting it is how troughs clog and seams fail years earlier than they should. Twice-a-year cleanouts and an annual seal check aren't glamorous, but they're what separates a ten-year system from a three-year one.
If you take one thing from this, prioritize the inspection before the product. Measure your clearance, check your joist spacing, look hard at the ledger. That fifteen minutes under the deck tells you more about which system will actually work than any spec sheet.
Get a Written Scope for Your Deck Drainage and Outdoor Living Project
Discuss your deck and drainage goals with Highlander Building Services, Inc. Explore outdoor living and gutter services. Include headroom, framing repairs, product choice, lighting and the full discharge path in a written scope.
For the wall connection, read our deck ledger flashing guide. Drainage should never hide unresolved structural rot.
Discuss Your Mountain Home Project
Highlander Building Services, Inc. serves Western North Carolina homeowners. Contact our team or request an inspection to discuss a written project scope. Call (828) 524-7773. Visit our Franklin service area for local information.
Frequently Asked Questions
Which under-deck drainage system fits an existing deck?
It depends on access, framing, posts and headroom. Some systems install below joists; above-joist products may require removing decking. Follow the selected product instructions and have framing assessed first.
Does drainage fix existing deck rot?
No. Drainage manages water but does not restore damaged ledgers, joists or connections. Structural damage must be assessed and repaired before a ceiling or membrane conceals it.
How much slope is needed?
Use the selected system's installation specification. Some systems call for 1/8 inch per foot or more, but requirements vary. Collector gutters and discharge also need a continuous drainage path.
What does a retrofit cost?
Deck area, access, framing repairs, product choice, finish and discharge routing determine cost. Request an itemized estimate; no fixed Highlander square-foot price is stated here.
Related Services
Get a straight answer about your roof in Western NC
Local crews, written scopes, and a response during business hours.
- 4.8★ Google · 158 reviews
- Licensed & insured · family-owned since 2017
- Franklin-based crews across 10 WNC counties
Calls are answered by the local team during working hours. Messages are answered during business hours.
More Western NC resources
Mountain-Proven Results
Written By
Highlander Editorial Team
Highlander Building Services
Expert roofing and construction guidance from the team that builds in Western North Carolina's mountains every day.
Why Highlander
Talk to a local roofer
Photos, findings, and a written scope — no pressure to buy anything.
(828) 524-7773Request an InspectionStart with three simple contact details.
Roofing or construction, you do not need to diagnose the problem or finish a long intake first. Send your contact details and Highlander will discuss the project with you.
Prefer to talk directly?
(828) 524-7773- 4.8★ Google · 158 reviews
- Licensed and insured
- Crews based in Franklin, serving Western North Carolina