
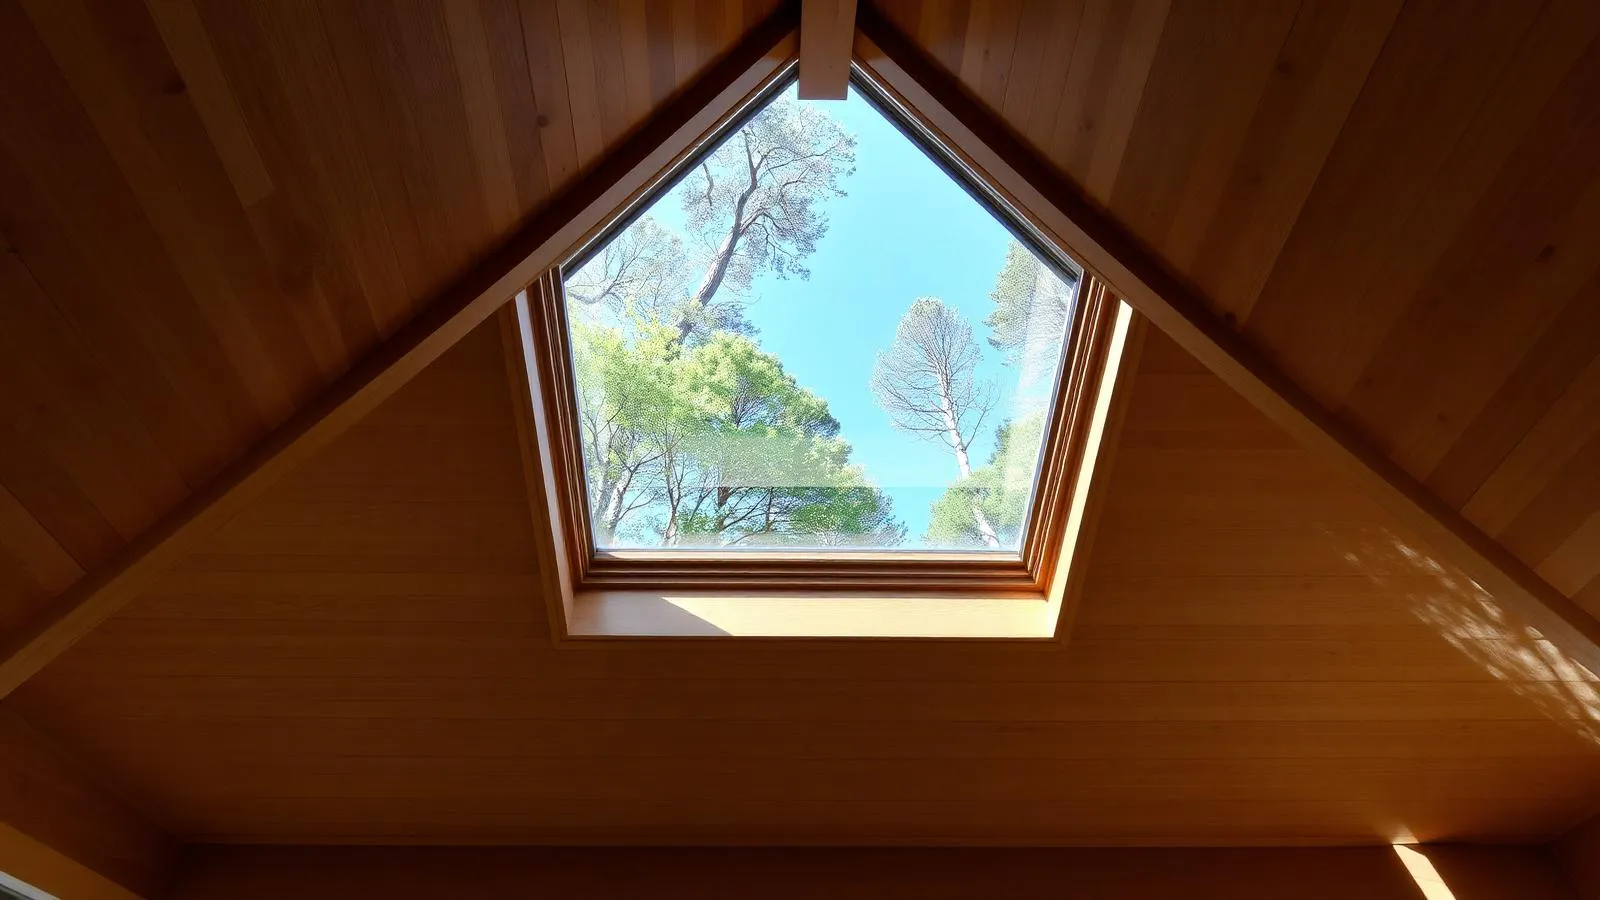
Even Daylight, Less Risk: Skylight Placement for Mountain Homes
Place skylights for even daylight, less glare, and fewer leaks with practical guidance on room placement, roof orientation, flashing, and mountain-home conditions.
Key Takeaways
Place skylights over the specific areas where you need daylight most — kitchen prep zones, baths, hallways — rather than centering them on the roof for maximum glare. North-facing units give the steadiest diffuse light, while south-facing glazing adds useful winter heat in cooler climates. Skip unshaded east- or west-facing placements that flood a room with harsh afternoon sun, and always confirm roof framing and flashing feasibility before cutting. Choosing ENERGY STAR rated products and correct flashing details cuts both energy loss and leak risk over the life of the roof.
Key Takeaways
- Proper skylight placement targets key areas like kitchens, bathrooms, and hallways, and considers roof orientation for comfort and energy efficiency.
- North-facing skylights provide consistent, diffuse light, while south-facing units can help with winter heating but may need shading to control summer heat.
- Proper flashing sequencing and attic inspection before installation are critical to prevent leaks and support long-term performance.
- ENERGY STAR rated products and verified product performance help homeowners compare efficiency before choosing a unit.
- Balancing daylighting, glare control, and furniture placement makes the room more comfortable and usable.
Best Skylight Locations by Room and Orientation
Not every room benefits from a skylight in the same way, and the roof direction you choose changes what that light actually feels like at different times of year.
Kitchens do well with a skylight positioned over the counter or island, where task lighting matters most. Bathrooms benefit from daylight without sacrificing privacy, since the glazing sits well above eye level. Hallways and stairwells often read as dark, wasted space, and a single well-placed unit can brighten the whole run. Living rooms can handle a larger skylight or a pair of smaller ones for general ambient brightness.
Orientation changes the character of that light. DOE guidance notes that skylights are less sensitive to orientation than vertical windows, but direction still matters for comfort and heat:
- North-facing skylights deliver even, diffused light with minimal glare or heat gain year-round.
- South-facing units bring welcome solar heat in winter, which helps in colder climates but can overheat a room in summer without shading.
- East-facing glazing floods a room with bright morning light that fades by midday.
- West-facing skylights create strong, often uncomfortable glare in late afternoon unless paired with shades or tinted glazing.
Splitting one large skylight into two or three smaller units spread across a room tends to produce more even illumination and fewer harsh hotspots than a single oversized opening centered on the ceiling.
Skylight Types, Size Rules, and Spacing for Even Daylighting
Fixed skylights are the simplest option and work well anywhere steady daylight is the goal, since there are no moving parts to maintain. Vented skylights open to release warm, moist air, which makes them a strong fit for bathrooms and kitchens. Tubular skylights channel light through a reflective tube and suit small rooms, closets, or spaces with low ceilings where a full-size unit would not fit.
Sizing follows a rough daylight factor principle: more glazing area raises the amount of natural light reaching the floor, but too much creates glare and heat swings. A few guideposts help:
- For subtle, supplemental daylighting, aim for skylight glazing equal to a small percentage of the floor area to balance light and comfort.
- In rooms with few or no windows, a higher glazing area relative to floor size may be used to achieve comfortable daylight levels.
- Space multiple units no farther apart than about 1.4 times the mounting height above the floor, a spacing guideline drawn from DOE toplighting research that keeps light levels consistent across a room.
Light wells and diffusers help spread light from a single opening across a wider area, which is often the better fix when roof framing limits where you can cut additional holes.
Roof and Structural Considerations Before You Cut the Roof
What’s above the ceiling matters as much as what’s below it. Roof pitch, covering material, and rafter spacing all determine which curb type and flashing detail will actually work for a given spot. A steep metal roof calls for different flashing than a low-slope asphalt shingle roof, and the framing bay has to align with where you want the opening.
Before any cutting happens, the attic deserves a close look:
- Check for plumbing vents, electrical runs, and HVAC ducts that might sit directly in the planned opening.
- Identify structural members, such as doubled rafters or ridge framing, that would require reinforcement or a shifted location.
- Note existing insulation levels, since an insulated light well preserves more of the room’s thermal performance than an open shaft.
When a duct or structural member blocks the ideal spot, you generally have three options: reinforce the framing, reroute the service, or shift the skylight a foot or two to a cleaner bay. Each adds cost, which is why a thorough attic inspection before signing off on placement matters more than it might seem.
Pro Tip: Walk the attic with a flashlight before finalizing placement. What looks like open ceiling from below is often crowded with ductwork or wiring above.
Our skylight installation guide for Western NC homes walks through how framing and flashing decisions connect directly to where a skylight can go.
Energy and Climate: Orienting Placement for Efficiency
Orientation affects heating and cooling costs, and the right choice depends on your climate. VELUX and ENERGY STAR modeling shows that in colder climates, south-facing skylights can reduce heating demand by adding passive solar gain in winter. In hot climates, north-facing placement minimizes unwanted cooling load since it avoids direct summer sun almost entirely.
Product selection matters as much as orientation. Skylights that meet ENERGY STAR criteria can be compared using ENERGY STAR climate guidance and the NFRC Certified Product Directory, which helps confirm how a specific model performs for your region before you commit to it.
Common Installation Pitfalls and Leak Prevention
Most skylight leaks trace back to a handful of avoidable mistakes rather than the glazing itself. Flashing sequencing is the single biggest factor in whether a skylight stays dry for decades or fails within a few years.
- Improper flashing order, especially skipping the step-by-step overlap at head, side, and curb transitions, is a common cause of water intrusion.
- Poor curb integration with the roof covering leaves gaps where wind-driven rain can work its way in.
- Sealant alone, without proper flashing beneath it, tends to fail and should never be the primary water barrier.
Industry flashing guidance outlines a specific sequence: pan flashing first, then step flashing integrated with the roof’s water-resistive barrier, then head flashing last so water always sheds downhill over the layer beneath it.
Uninsulated light tunnels also lose heat and can cause condensation drips inside the tube. Wrapping the tunnel in insulation keeps the space between the roof opening and the ceiling from acting as a thermal bridge. Our skylight replacement guidance covers how aging flashing and insulation show up as performance loss over time.
How to Plan Placement for Even Daylighting and Low Glare
A practical placement plan takes three steps:
- Identify your task zones first — counters, reading nooks, hallways — and decide how much daylight each one actually needs.
- Measure the room’s ceiling height and floor plan, since both affect how far light spreads from a single opening.
- Estimate skylight area using the sizing ranges above, then space multiple units roughly 1.4 times the mounting height apart for even coverage.
Diffusers soften harsh direct light, and a splayed light well — angled wider at the ceiling than at the roof deck — spreads light across more of the room instead of casting a single bright spot on the floor.
Pro Tip: Pair skylights with daylight-sensing controls on nearby electric lighting so fixtures dim automatically as natural light increases, which stretches the energy benefit beyond just the skylight itself.
Our natural light layout guide has more detail on avoiding dark corners and uneven hotspots in multi-room layouts.
Maintenance, Expected Lifespan, and When to Call a Pro
A seasonal check catches most problems before they become expensive ones.
- Inspect flashing, seals, and glazing twice a year, typically spring and fall, for cracking, discoloration, or gaps.
- Watch for condensation between panes or persistent fogging, both signs the seal has started to fail.
- Clean the glazing and surrounding curb of debris that traps moisture against the flashing.
Call a licensed installer when you see recurring leaks, need warranty-covered repairs, or are dealing with a complex roof penetration involving multiple framing members. Attempting a reflash on a steep or multi-layered roof without experience often turns a small leak into a larger one.
How Highlander Applies Local Mountain-Home Experience to Placement Choices
Elevation, wind exposure, and persistent moisture shape how we approach every skylight placement in Western North Carolina. Those conditions influence curb height, flashing choices, and where a light well needs extra insulation to avoid condensation. Our process starts with a site inspection and a written scope, followed by VELUX installation with one point of contact throughout. Readers weighing a regional installer or site consultation can see what that process looks like in practice.
Considerations for Privacy and View When Placing Skylights
A skylight’s position on the roof plane, rather than a wall, already solves most privacy concerns that come with vertical windows, since neighbors and passersby rarely have a sightline into an opening overhead. That makes skylights a strong option for bathrooms, bedrooms, and other rooms where a traditional window would need curtains or frosted glass just to stay private.
View is a separate question from privacy. Most skylights frame sky and treetops rather than a horizon view, so placement should consider what’s actually visible through the opening — tree canopy, a neighboring roofline, or open sky — rather than assuming any roof location looks the same from inside. A skylight positioned near a tall tree may show branches shifting with the wind, which some homeowners enjoy and others find distracting in a reading nook or home office.
Operable or vented units add another layer worth weighing: an opening skylight over a second-story bedroom offers ventilation without the privacy trade-off of a ground-floor window left open. For rooms where some control over brightness and visibility matters, frosted or diffusing glazing softens the view through the glass while still admitting plenty of light, a useful middle ground for bathrooms or spaces facing a neighboring structure.
Before finalizing a location, it’s worth standing in the room and looking up at the section of roof you’re considering, since the angle of view from a couch or bed is often different from what you’d expect standing at the center of the floor.
Effect of Skylight Placement on Furniture and Interior Design Layout
Where a skylight lands on the ceiling shapes how a room gets used long before any furniture goes in. Direct sun tracking across a sofa or bed for several hours a day fades fabric and can make a seating area uncomfortably warm in the afternoon, so it helps to map the sun’s path for your specific orientation before settling on a final spot.
Placement also affects where furniture can go. A skylight centered directly above a dining table creates dramatic overhead light for meals, but the same position above a home office desk can cause glare on a computer screen unless paired with a shade. Artwork and photographs are especially sensitive to direct sun exposure, so a wall beneath unshaded south- or west-facing glazing isn’t the best spot for anything you don’t want to fade.
Reflective surfaces — light-colored walls, glossy flooring, mirrors — extend a skylight’s effect well beyond the beam of direct light hitting the floor, which is one reason a single well-placed unit can brighten more of a room than its size would suggest. Rooms with dark furniture or flooring benefit more from careful skylight placement since they absorb more light and need a stronger source to feel bright.
Layout flexibility matters too. If a room’s furniture arrangement is likely to change over time, a skylight positioned toward the center of the ceiling rather than directly above one planned furniture piece keeps the lighting useful no matter how the space gets rearranged later.
Author Perspective: Balance Usable Daylight With Durability
The appeal of skylights is obvious, but the mistake we see most often is choosing a location for showroom brightness rather than daily function. A skylight that floods a kitchen with harsh west sun at 5 p.m. looks dramatic in a catalog and gets the blinds closed within a month. The better approach treats placement as a trade-off between task lighting, seasonal heat, and flashing complexity, which almost always means involving a contractor before the roof gets cut, not after.
*— Highlander Building Services*
Skylight Planning and Installation Built Around Your Roof
We handle the full scope: site inspections, VELUX skylight installation, flashing and insulation work, and a written estimate before anything gets cut, backed by local crews who know Western North Carolina roofs.
| What we assess | What you get |
|---|---|
| Roof pitch, framing, and attic obstructions | A written scope with exact placement and costs |
| Flashing and insulation needs | VELUX installation with proper flashing sequencing |
| Climate and orientation for your home | A single point of contact through the project |
Ready to find the right spot on your roof? Request a skylight installation estimate from our team.
Sources
- Toplighting: Energy Saving Potential and Potential Paths Forward — DOE/TIAX
- A Study of the Energy Impacts of Residential Skylights in Different Climates — VELUX / ENERGY STAR
Recommended Reading
Frequently Asked Questions
Why aren’t skylights as popular as they once were?
Concerns about leaks and energy loss from older, poorly flashed units gave skylights a reputation they haven’t fully shaken. Modern ENERGY STAR rated products and correct flashing installation address most of those historical problems when installed properly.
Where do most skylight leaks usually happen?
Most leaks start at the flashing transitions, the head, side, and curb areas, rather than the glazing itself. Following the proper flashing sequence, pan flashing first, then step flashing, then head flashing, prevents water from working its way under the roof covering.
What should you avoid when placing a skylight?
Avoid centering a single oversized skylight on the roof without considering orientation, since unshaded west-facing glazing often creates glare and overheating. It also pays to avoid cutting into the roof before checking the attic for ducts, wiring, or structural members that could block the ideal spot.
Do skylights make a house hotter?
It depends on orientation and glazing choice: south and west-facing skylights can add noticeable heat in summer, while north-facing units stay much cooler year-round. Climate-specific modeling shows the effect varies enough by region that orientation should match your local climate rather than a one-size-fits-all rule.
Related Services
Compare materials on your actual roof in Western NC
Pitch, exposure, and access change what makes sense. We price the real options, not a generic quote.
- 4.8★ Google · 158 reviews
- Licensed & insured · family-owned since 2017
- Franklin-based crews across 10 WNC counties
Calls are answered by the local team during working hours. Messages are answered during business hours.
More Western NC resources
Mountain-Proven Results
Written By
Highlander Editorial Team
Highlander Building Services
Expert roofing and construction guidance from the team that builds in Western North Carolina's mountains every day.
Why Highlander
Talk to a local roofer
Photos, findings, and a written scope — no pressure to buy anything.
(828) 524-7773Request an InspectionStart with three simple contact details.
Roofing or construction, you do not need to diagnose the problem or finish a long intake first. Send your contact details and Highlander will discuss the project with you.
Prefer to talk directly?
(828) 524-7773- 4.8★ Google · 158 reviews
- Licensed and insured
- Crews based in Franklin, serving Western North Carolina