
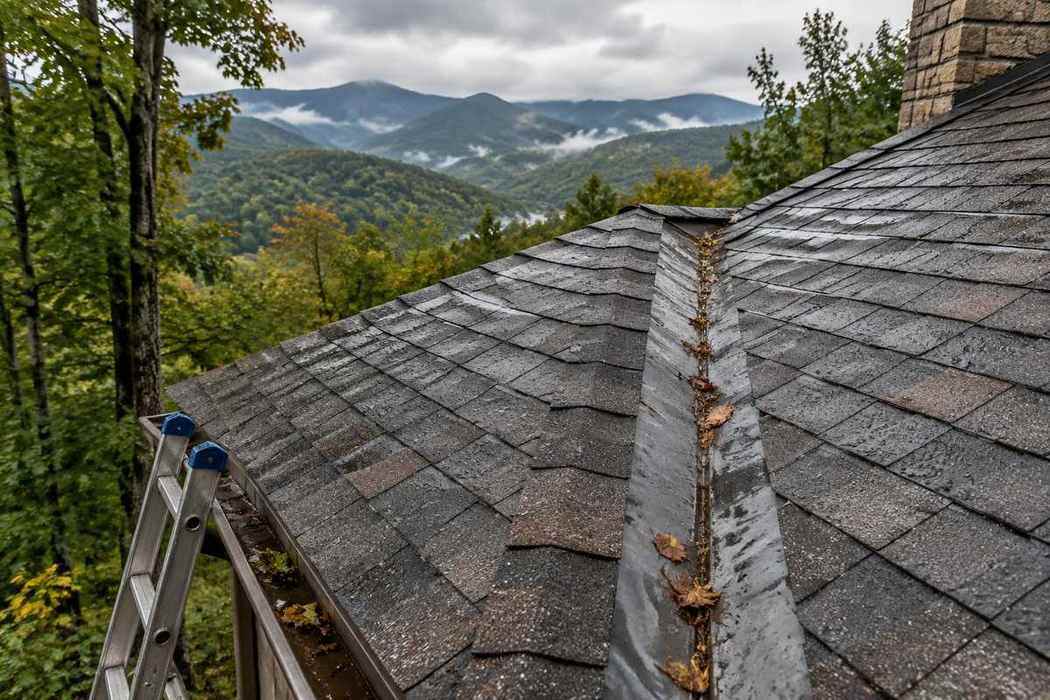
5 Causes of a Roof Valley Leak and When to Call a Pro
Learn why roof valleys leak, how to spot warning signs safely, and when a Western North Carolina valley needs a targeted repair or full rebuild.
Key Takeaways
A roof valley leak usually traces back to one of five problems: damaged valley lining, exposed fasteners in the water path, corroded flashing, a valley method that does not suit the shingle, or debris that pushes water beneath the roof covering. Because valleys collect runoff from two roof slopes, a small installation or maintenance problem can become an interior leak quickly during Western North Carolina's heavy rain.
Start with a safe inspection from the ground and inside the attic. A surface patch may slow a small leak, but recurring moisture, damaged decking, or widespread corrosion calls for a professional rebuild of the valley assembly.
What Is a Roof Valley?
A roof valley is the inside angle where two sloped roof sections meet. It carries water toward the gutter or eave, concentrating more runoff than the surrounding roof surface. That extra volume makes correct flashing, underlayment, fastener placement, and debris control especially important.
Three valley types are common:
- Open metal valley: Exposed metal runs down the center while shingles stop short on both sides. It moves heavy runoff effectively, but corrosion, punctures, poor laps, or exposed fasteners can create leaks.
- Closed-cut valley: Shingles cross the valley from one slope and are cut in a straight line on the other. An uneven cut or incorrect fastener placement can expose the assembly to water.
- Woven valley: Shingles from both slopes overlap through the center. This method must suit the selected shingle and follow its installation instructions.
From a safe ground-level position, binoculars can help identify the valley type and obvious debris, lifted shingles, rust, or past repairs. Do not climb onto a wet, steep, icy, mossy, or damaged roof.
Five Common Causes of a Roof Valley Leak
1. Damaged or Incomplete Valley Lining
Valleys need a continuous water-shedding assembly beneath the visible roofing. Missing membrane, short material, poorly formed laps, or damage from an earlier repair can allow runoff to reach the decking. The International Residential Code valley-lining requirements establish minimum methods, while the selected roofing product may require additional details.
2. Fasteners in the Water Path
A nail that causes no problem on an ordinary roof plane can leak when it sits where valley water flows. Exposed heads, fasteners driven too close to the center, and holes left by removed fasteners deserve careful attention. Sealant over a nail head may hide the symptom without correcting the assembly beneath it.
3. Corroded or Punctured Valley Metal
Metal can rust, split, or develop holes from falling limbs, foot traffic, or incompatible repair materials. Corrosion often begins at laps, fasteners, and places where wet debris remains against the flashing. A small isolated puncture may allow a temporary repair, but broad corrosion is a reason to replace the affected valley section.
4. The Wrong Valley Method or Poor Installation
The valley design must work with the roofing material and the roof geometry. Problems arise when shingles do not bend or overlap as required, a closed-cut line wanders into the flow channel, upper flashing pieces slip behind lower pieces, or the valley terminates incorrectly near an eave, wall, chimney, or dormer.
5. Leaves and Needles Blocking Drainage
Mountain homes surrounded by hardwoods and pines collect leaves, needles, twigs, and shingle granules. Debris can hold moisture against metal and create a dam that sends water sideways beneath shingle edges. Valleys and the gutter openings below them should be checked after major leaf drop and severe storms.
How to Trace the Source Safely
A ceiling stain rarely sits directly below the entry point. Water can travel along decking, rafters, fasteners, or insulation before it becomes visible indoors. Use a methodical sequence instead of applying roof cement near the stain and hoping for the best.
- Map the interior evidence. In the attic, photograph wet decking, dark trails, damp insulation, and the highest visible point of moisture. Note nearby framing so the location can be matched outside.
- Review the roof from the ground. Look for valley debris, displaced shingles, exposed metal edges, corrosion, branches, and previous patches. Binoculars or a zoom lens are safer than an unnecessary roof walk.
- Check nearby roof features. Chimneys, vents, sidewalls, and skylights near a valley can send water toward the same interior area.
- Record when the leak appears. Wind direction, rain intensity, snow melt, and freeze-thaw conditions help distinguish a valley problem from another flashing failure.
- Request a physical inspection. If the source is not visible from a safe position, a licensed roofing contractor can inspect the surface, moisture path, flashing, and deck condition.
Do not use a garden hose on a steep roof or climb onto a slick surface to reproduce the leak. Controlled water testing is best handled by a contractor who can isolate small sections without forcing water beneath otherwise sound materials.
Warning Signs Inside the Home
The first sign may be a ceiling stain that darkens during hard rain and fades as the area dries. Other signs include peeling paint, a musty attic odor, damp insulation, dark marks along roof sheathing, softened drywall, or a drip near an interior wall or light fixture.
A line of staining that follows the valley slope in the attic is strong evidence, but nearby flashing still needs to be ruled out. Active mold, sagging material, or wet structural framing suggests the leak has been present long enough to require prompt professional evaluation.
Temporary Patch or Full Valley Rebuild?
A temporary patch may be reasonable when a contractor finds one isolated puncture in otherwise sound valley metal and confirms the surrounding deck, underlayment, and flashing remain intact. The repair material must be compatible with the existing metal and positioned so water flows over it rather than against an exposed upper edge.
A rebuild is the more durable path when:
- The leak returns after a previous patch.
- Corrosion or damage extends beyond one isolated spot.
- Decking is wet, soft, delaminated, or decayed.
- Several fasteners sit in the active water channel.
- Shingle edges are brittle, cracked, or incorrectly cut.
- The valley meets a chimney, dormer, wall, or several roof planes.
- The existing method does not follow current product instructions.
A proper rebuild normally means removing enough roofing to expose sound material, replacing damaged decking, installing the required membrane and flashing, and reinstalling the roof covering with fasteners outside the active flow path. The exact assembly should follow the roofing product instructions and applicable code.
Materials That Perform in Mountain Weather
Valley performance depends on the complete system, not one product. Corrosion-resistant metal, compatible fasteners, self-adhered membrane where required, correctly directed laps, and careful shingle placement all work together.
Galvanized steel, aluminum, and copper each have different service lives, costs, and compatibility requirements. Mixing metals can accelerate corrosion, so repair materials and fasteners should be selected as a system. The visible metal is only one layer; the condition and coverage of the membrane beneath it matter just as much.
For a dimensional shingle roof, the valley method should match the product instructions and roof geometry. For a metal roof, panel transitions, clips, sealant locations, and valley trim need to be designed to move water while allowing normal expansion and contraction.
How Western North Carolina Weather Raises the Risk
Heavy mountain rain tests every lap and fastener because two roof slopes feed the same narrow channel. Wind-driven rain can move sideways beneath loose shingle edges, while snow and freeze-thaw cycles can slow drainage and push meltwater into weak points.
Higher-elevation homes also experience rapid temperature changes, shaded roof sections, and persistent moisture from tree cover. Debris that seems minor in dry weather can become a dense wet mat in a storm. This is why local exposure, roof pitch, surrounding trees, and drainage capacity all matter during a roof repair assessment.
Preventive Maintenance for Roof Valleys
Most homeowners can reduce risk without stepping onto the roof:
- Look at valleys and gutters from the ground after severe storms and major leaf drop.
- Keep nearby branches trimmed by a qualified tree professional.
- Watch for recurring debris at the same valley and gutter outlet.
- Check the attic after prolonged rain for new staining or damp insulation.
- Photograph changes so a contractor can compare conditions over time.
- Schedule an inspection when rust, lifted shingles, repeated stains, or previous patching appears.
An inspection should identify the likely entry point, document deck and flashing conditions where visible, explain whether the work is temporary or permanent, and provide a written scope before repairs begin.
When to Call a Roofing Professional
Call a licensed roofer when the leak repeats, the valley metal is broadly corroded, the roof is steep or unsafe to access, the decking may be damaged, or the valley intersects another roof feature. These conditions require more than surface sealant.
Highlander Building Services, Inc. evaluates roof leaks across Western North Carolina's mountain communities. The goal is to identify how water entered, determine how far moisture traveled, and write a clear repair scope covering the materials that actually need attention. If a valley leak points to wider wear, the inspection can also clarify whether targeted work or roof replacement is the practical next step.
If you see an active leak, move belongings away from the area, contain interior water where it is safe to do so, and request a roof inspection. Avoid entering an attic near wet electrical wiring or visibly compromised framing.
Sources
Local to Franklin, NC
This article was written specifically for homeowners in Franklin and the surrounding area. Highlander Building Services serves Franklin and all of Western North Carolina with in-person consultations and local crews.
Talk With Our Local TeamFrequently Asked Questions
Can I fix a roof valley leak myself?
Ground-level checks and attic documentation are appropriate for homeowners. A recurring leak, corroded flashing, damaged decking, or work on a steep roof should be handled by a licensed roofing professional.
What is the most common cause of a leaking roof valley?
Common causes include damaged valley lining, fasteners in the water path, corroded flashing, incorrect installation, and debris that redirects runoff beneath shingles.
Is roof cement a permanent valley repair?
Roof cement may slow a small isolated leak temporarily, but it does not correct failed membrane, widespread corrosion, poor flashing laps, or damaged decking.
How can I tell whether the valley or a nearby feature is leaking?
Map attic moisture to its highest visible point, inspect from the ground, and check nearby chimneys, vents, walls, and skylights. A contractor may need to isolate the source because water often travels before appearing indoors.
When does a roof valley need to be rebuilt?
A rebuild is usually appropriate when leaks recur, corrosion is widespread, decking is wet or soft, fasteners cross the flow path, or the existing valley method was installed incorrectly.
Related Services
Have your roof looked at in Franklin, NC
Most maintenance issues are cheap to fix and expensive to ignore. We'll tell you which one this is.
- 4.8★ Google · 158 reviews
- Licensed & insured · family-owned since 2017
- Franklin-based crews across 9 WNC counties
Calls are answered by the local team during working hours. Messages get a reply within one business day.
More for Franklin, NC
Real Work in Franklin
Market Context
Roofing & Construction in Franklin
Explore localized standards and proven projects in your area.
Written By
Highlander Editorial Team
Highlander Building Services
Expert roofing and construction guidance from the team that builds in Western North Carolina's mountains every day.
Why Highlander
Roofing help in Franklin, NC
Photos, findings, and a written scope — no pressure to buy anything.
(828) 524-7773Request an Inspection